I've been in Detroit now for two weeks and haven't made a post so as I looked out the window this am and saw that once again we got dusted by snow, I thought I'd take a minute to update you all on the current state of affairs.
#1 thing is...I love working on my van. This has been challenging, liberating, frustrating and satisfying. <-- that could describe a bowel movement as well....but we're talking about my van ;)
#2 It is all about the Order of Operations...period
#3 Your haynes manual is pretty good...but sometimes you just have to figure out the missing steps on your own...and it can take awhile
#4 It makes it 100 times easier if your visual aid is 10 ft away from you...being able to walk over to the old chariot and have a look see has been great
#5 you really really should just do one thing at a time...more on that later
=================================================================
Currently I am about to install the intake manifold and then finish it up with the carb, electrics and water lines.
To get to this point though I ....
Jacked up both vans and went to work with my wrenches.
1984 to the 1981
Starter
alternator
Front shocks
Rear shocks
Air springs
rear bumper
transmission cooler
Radiator + shroud
Battery
Ignition coil
distributor rotor
Headlights
front grill
all tires
Removed from the 1981
Intake
Carb
all vacuum controls
Removed from the 1984
Edelbrock carb
Edelbrock Intake
Mechanical work to come
Install intake
Install Carb
Install valve covers
Run fuel lines
run coolant lines
tighten everything one last time
fire it up
Change over the front springs, all insides, boxes, scooter...blah blah blah (it's a lot...a daunting amount)
-----------------------------------------------------------------------------------------------------------------


I wanted to have brushed steel covers, just for fun, but I thought I should apply something for rust....didn't want to go back into the store (again) so i used a can of rust converter that I had in the old van. It went on strange and turned them a purple sort of colour. I don't know if I like it or not, won't know till it's all on there...but it's different anyway.
======================================
And that is where I'm at....
=====================================================
alright....Feb 19th...time for an update.


#1 thing is...I love working on my van. This has been challenging, liberating, frustrating and satisfying. <-- that could describe a bowel movement as well....but we're talking about my van ;)
#2 It is all about the Order of Operations...period
#3 Your haynes manual is pretty good...but sometimes you just have to figure out the missing steps on your own...and it can take awhile
#4 It makes it 100 times easier if your visual aid is 10 ft away from you...being able to walk over to the old chariot and have a look see has been great
#5 you really really should just do one thing at a time...more on that later
=================================================================
Currently I am about to install the intake manifold and then finish it up with the carb, electrics and water lines.
To get to this point though I ....
Jacked up both vans and went to work with my wrenches.
1984 to the 1981
Starter
alternator
Front shocks
Rear shocks
Air springs
rear bumper
transmission cooler
Radiator + shroud
Battery
Ignition coil
distributor rotor
Headlights
front grill
all tires
Removed from the 1981
Intake
Carb
all vacuum controls
Removed from the 1984
Edelbrock carb
Edelbrock Intake
Mechanical work to come
Install intake
Install Carb
Install valve covers
Run fuel lines
run coolant lines
tighten everything one last time
fire it up
Change over the front springs, all insides, boxes, scooter...blah blah blah (it's a lot...a daunting amount)
-----------------------------------------------------------------------------------------------------------------
 |
| Getting this party started |
 |
| 1981 before any changes. Note the vacuum lines on the rad hose |
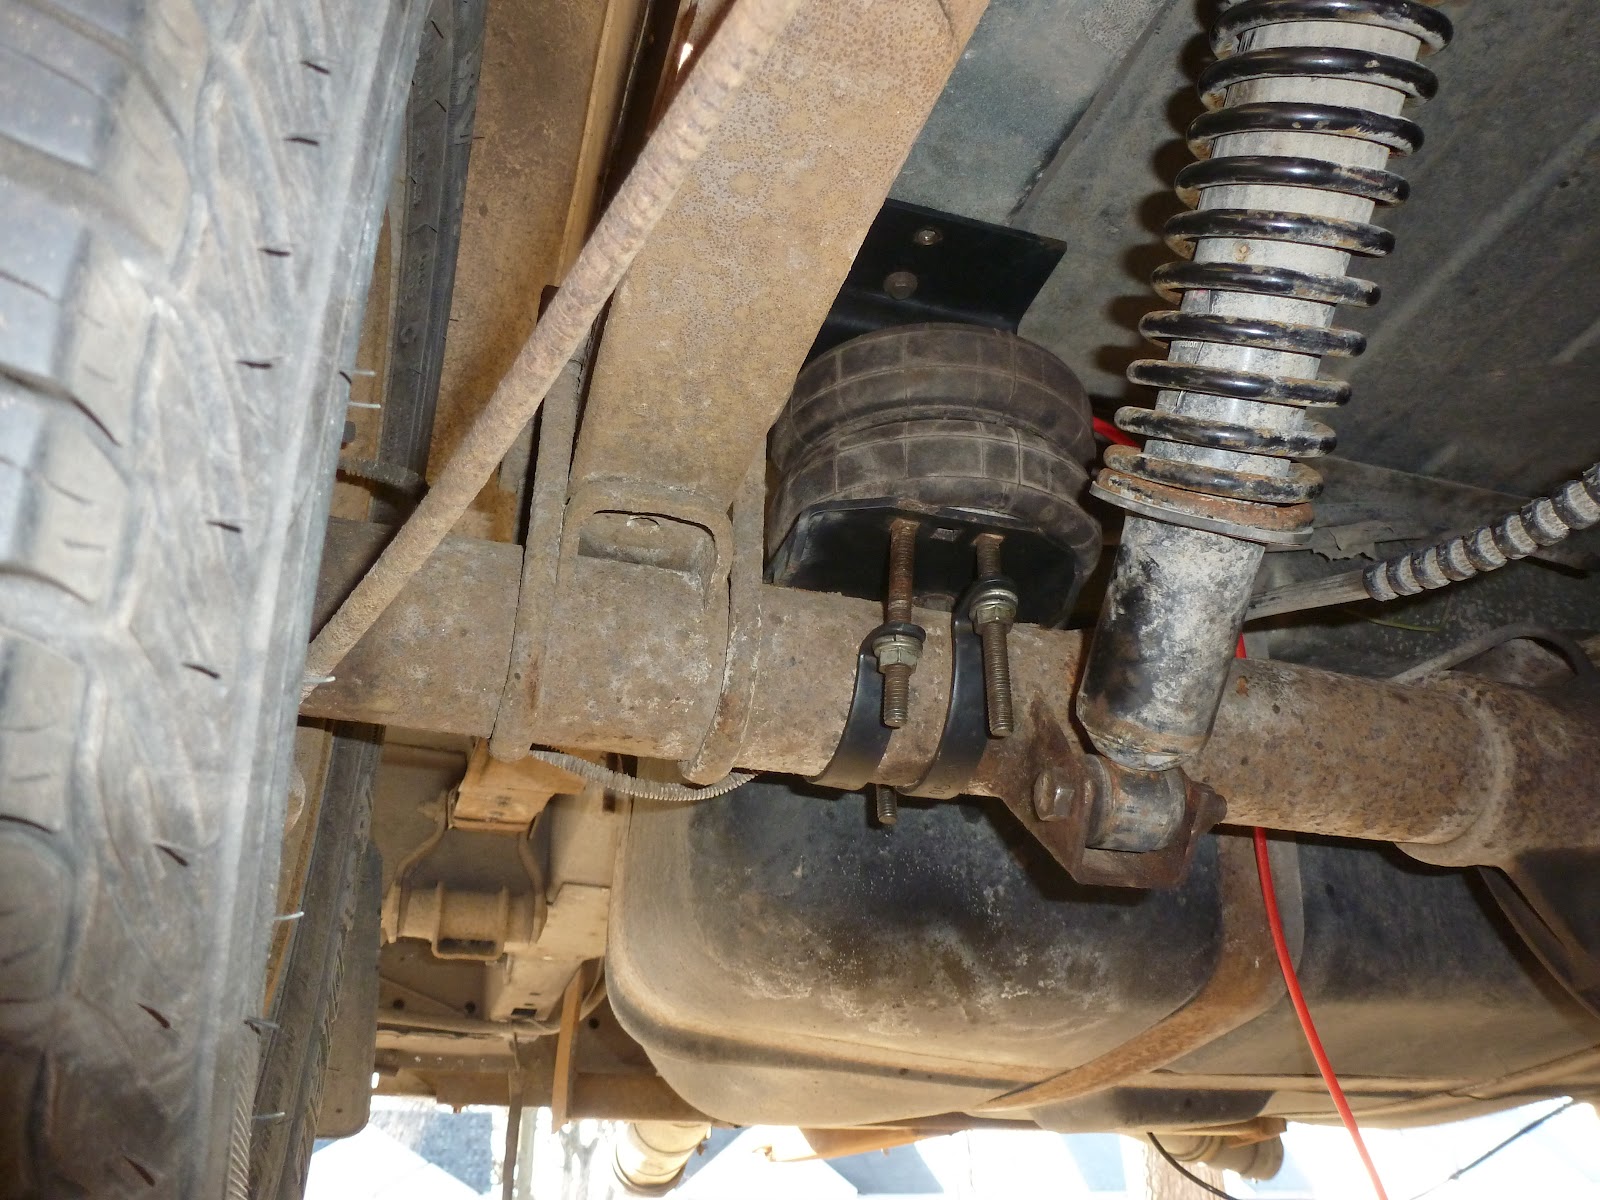 |
| Rear overload shocks and airsprings moved over. After the 3rd time doing so in 6 months |
 |
| 1984 |
 |
| 15ft away...1981 |
 |
| Sam...never quiet always cute |
 |
| rad and trans cooler from the 84 |
 |
| taking the grill because it already has these snaps mounted for the grill screen |
 |
| taking this fan from the 84 as the stock 81 fan seems less aggressive |
 |
| 1984 |
 |
| stripping the vacuum controls in the 1981 |


 |
| carbon crud after pulling the 81 intake manifold |
 |
| poorly applied original water chamber sealing |
 |
| Ready for cleaning |
 |
| original blue.... |
 |
| cache of parts for the 84 |
 |
| 84 |
 |
| 81 |
 |
| 81 |
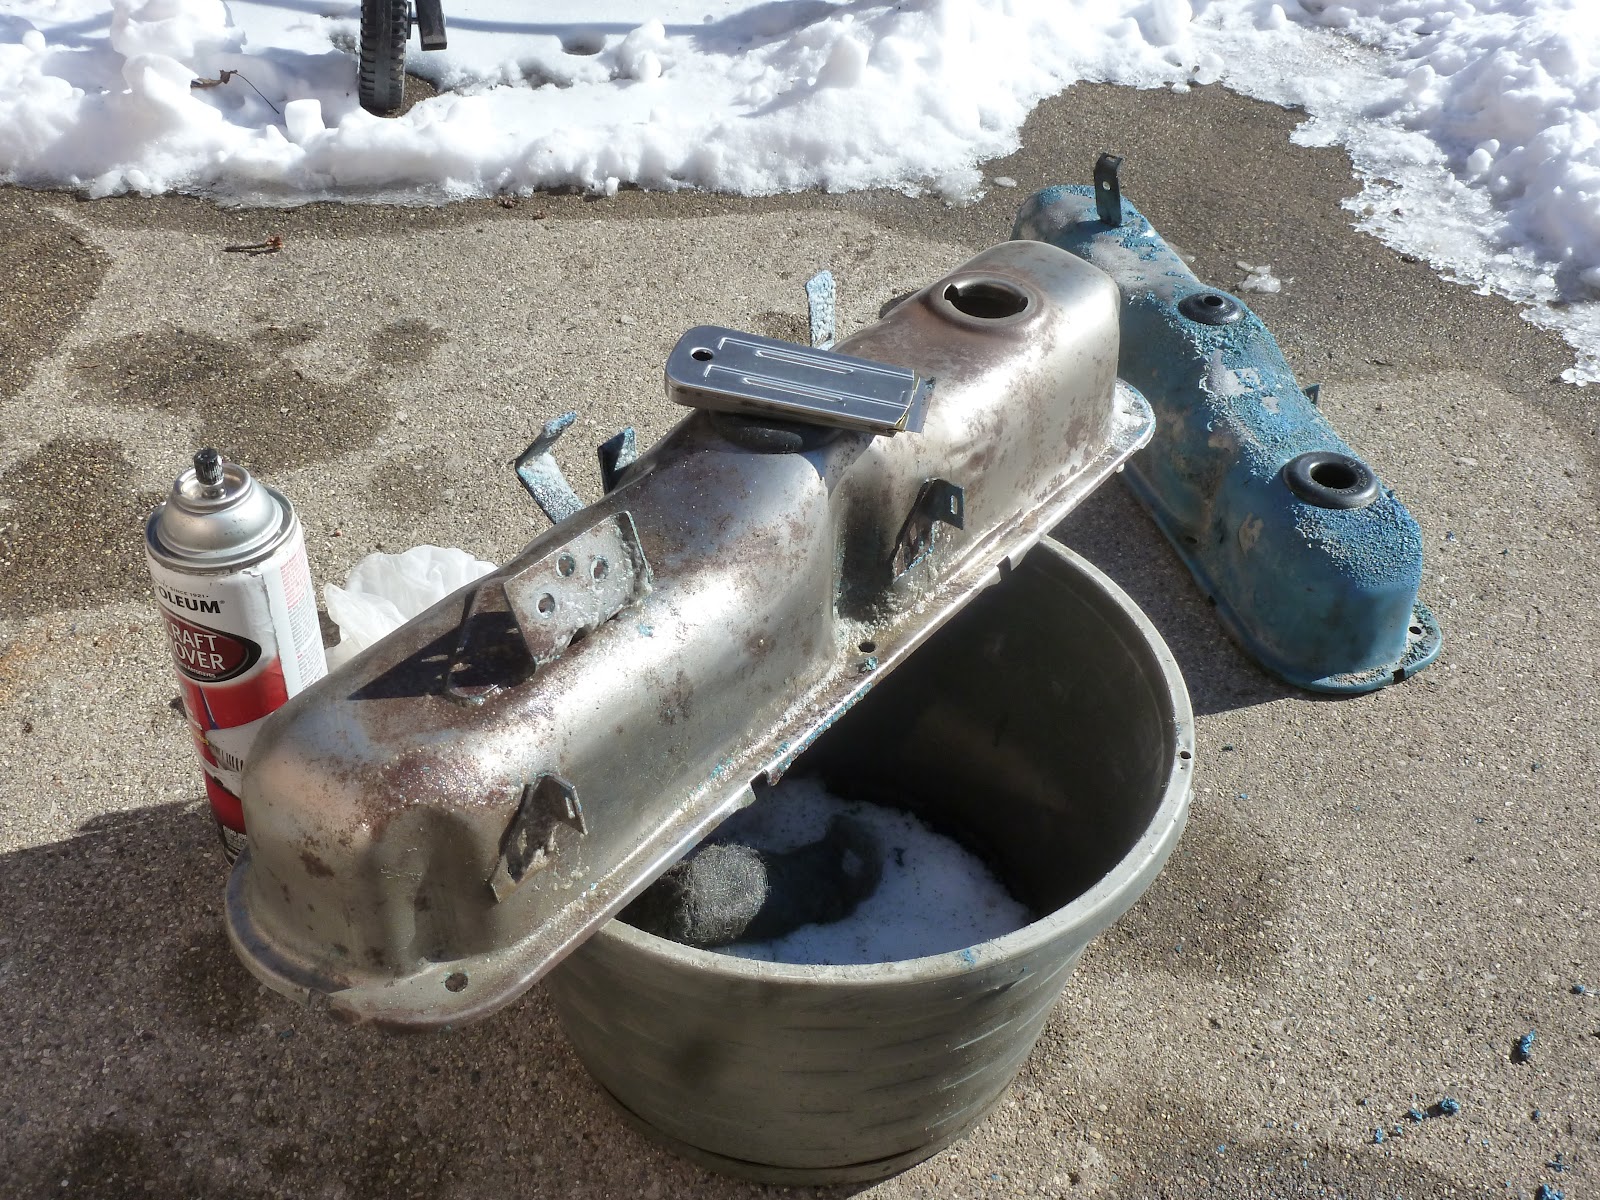 |
| cleaning the covers |

 |
| After polish and metal treatment |

I wanted to have brushed steel covers, just for fun, but I thought I should apply something for rust....didn't want to go back into the store (again) so i used a can of rust converter that I had in the old van. It went on strange and turned them a purple sort of colour. I don't know if I like it or not, won't know till it's all on there...but it's different anyway.
======================================
And that is where I'm at....
=====================================================
alright....Feb 19th...time for an update.
 |
| If you ever do this job...just follow the instructions, don't second guess them. I bought this edelbrock 7276 gasket but when I put it on I was worried that the center port (horseshoe) is used for nothing. It is a cooling tube for the exhaust crossover. Thanks to the guys at Vannin.com for their help. |
 | |
| ready again after a gasket scare...... |
 |
| Mucho's thanks to Mark from back home...after a flurry of phone calls he got me in the right direction...slipped onto the guise studs no problem...and viola. Here it is hand tightened |
 |
| carb gasket on...looking and feeling good |
 |
| my backyard paint shop |
 |
| baking the parts in my camper using the furnace. Parts painted, exhaust heat shield, block crossover caps, oil cap, trany and oil dipstick, fuel line bracket, air cleaner, valve covers and ignition coil bracket. |

 |
| ready for the valve covers |
 |
| A D-troit bus stop...I tried to catch the people sitting on shopping carts but T decided that people hate having their picture taken and Mario Andretti'd me past the point. A note...this city is starving to death and I have heard that they will be further reducing the bus service in March. It is a strange place to be after living in Calgary for so long and seeing only growth |
 |
| You've got to have a White Castle break...this is the crave case...30 sliders (followed by some gas)...oh Yeah!! |
 |
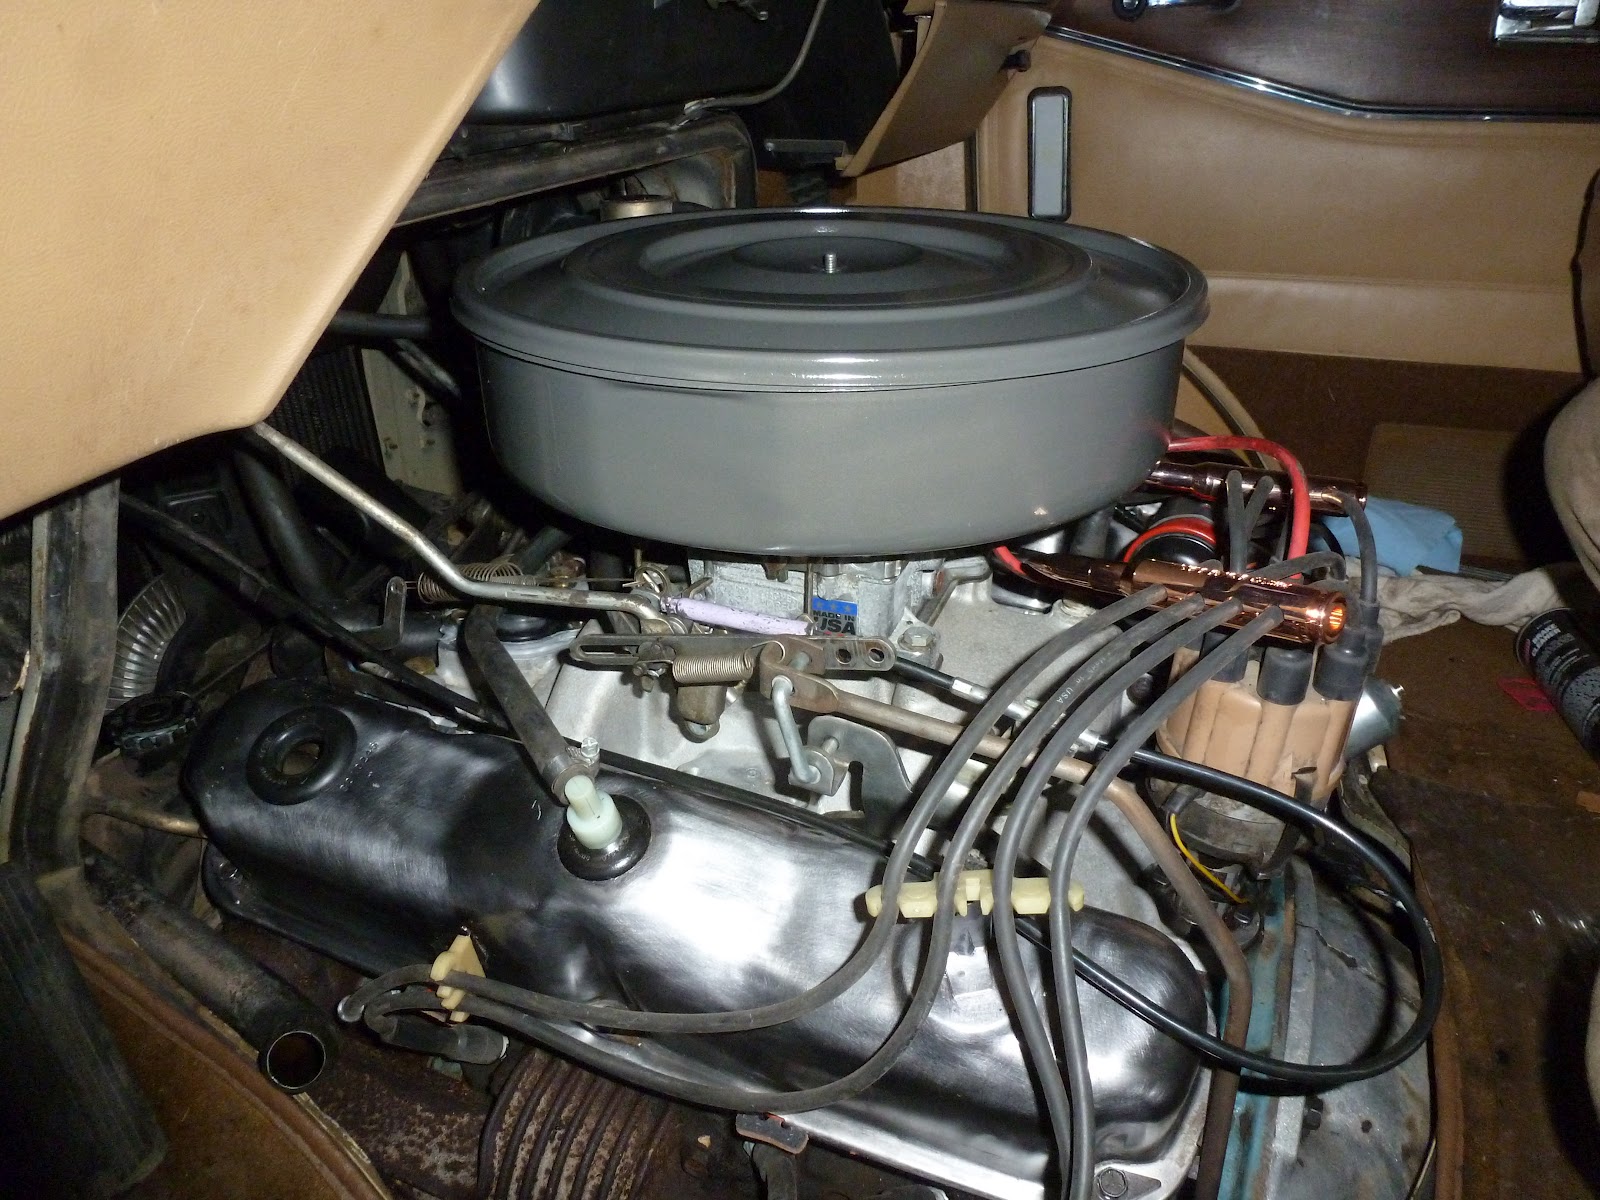
| carb is on...notice the very technical water protection..press and seal saranwrap |
 |
| covers on...starting to put the details together |
 |
| used pictures of my carb issues on the kooteny as a model...apparently I decided that I'd only take pictures of taking apart the 1981 van...and not the 1984. |
 |
| mostly ready to roll... |
 |
| This is pretty much done...I don't have bolts for my radiator shroud so I can't hook up the upper rad hose line...so we wait |
 |
| I am cleaning up the wires here...because I can...and because I also bought these awesome .50 cal mock up bullets that are spark plug wire separators. Thanks to TuffRides for a neat-o product |
 |
| mocked up |
 |
| it looks pretty good...I did manage to break a damn exhaust manifold bolt. I turned one...no problem (total lie...I soaked it in liquid wrench, scraped it...and then it turned)...I did the same for the other..even used less pressure...snap-o. So a rare earth magnet is holding it on for now...that piece will disappear if I ever upgrade to headers |
 |
| I will need to take the bullets off again to dress the wires up a little more...makes me smile |
 |
| TUFFRIDES!!!! New Door Panels...a side project while awaiting the help of a real mechanic.... |
 |
| old panels, upholstery padding glued to one side |
 |
| Fabric cut to rough size and then pulled sort of tight and hammer tacked down |
 |
| Ta Da! Total cost $23 |
 |
| Doors without panelling |
 |
| One on...screw holes are very hard to find..I used the random pin stand method |
 |
| I didn't realize the clearance was so small on the right door panel. It is pressed up against the water tank box quite tight...but looks good anyway. Thanks to my brother-in-law and the guys at Vannin.com for their advice |
 |
| old roof vent |
 |
| new roof vent...it got a little twisted from the explosion but works fine |
 |
| everything fits just like before |
 |
| door panel shot |
 | |
| after waiting for a mechanic, trying to find a mechanic to come to this area and being uncertain if i could do it myself...I decided to just go for it. Dangerous job with a bottle jack and jack stands that are too short...but I'm still alive and I got them out without losing any appendages |
 |
| I sent Ryan at www.tuffrides.com and said thanks but then added that I wish I had of gotten the blck and chromes...presto in the mail comes these awesome .50cals!! Thanks so much to him, they look great |
 | ||
| The real final product of a few weeks of work |
No comments:
Post a Comment
Thank you!